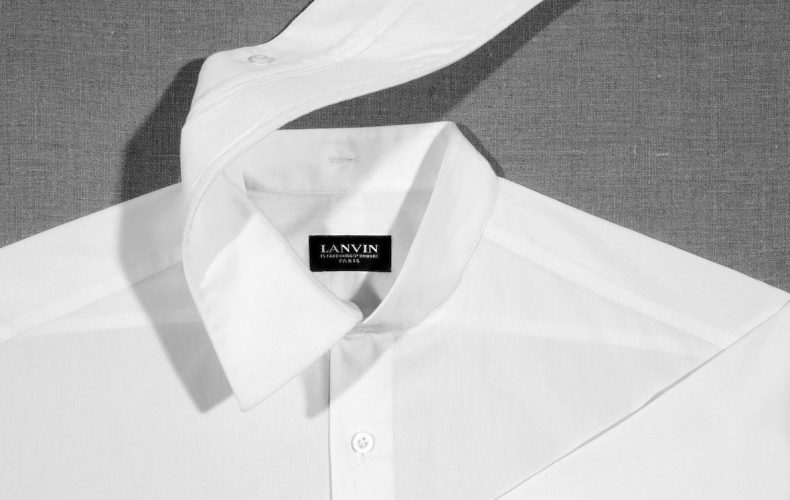
Let’s be honest; ironing is not exactly something that excites the modern man – but it definitely is a skill one has to master to look well-groomed and professional. As shirts are the key item in various looks – from smart casual to urban minimalist – they need to look their best when worn. And that does not have to be a hard job at all. That’s why we’ll teach you the tricks of the trade with this compact guide on how to iron a shirt and get that perfectly crisp, wrinkle-free chemise.
The 5 items you need to iron a shirt
To pull it off quick and effectively, there are a few tools you will need. Make sure to arm yourself with the following items before you start.
An iron
The iron will do the dirty work for you – if you pick the right one and if you master it well. There are a few features to look out for. First: the iron has to be clean and well taken care of. The same goes for your shirts: ironing with either a dirty iron, or using a clean iron on a dirty shirt will cause trouble. The heat of the iron presses stains even more into the fabric, making it eventually harder or even impossible to remove them.
Next: as we are speaking of a clean iron: the most important part here is the soleplate, or simply said, the iron bottom of the device. Not sure if it’s completely clean and if it will stain or not? Play it safe and don’t take any chances: try ironing an old piece of fabric or a towel as a test.
Now let’s start with the basics: look for an iron that has a built-in water reservoir and a steam option. Steam is well known for its anti-wrinkle effect since, in this way, the heat will be distributed evenly onto the fabric, using nothing but water. Also: this form of spreading heat while ironing is suitable for the stiffest fabrics as well as more delicate materials.
The capacity in the temperature of the device plays a big part in this as well. Meaning: the hotter it gets, the easier it gets. Irons that come with higher power consumption will be heated more quickly, and that’s exactly what we need to iron a shirt quick.
An ironing board
What’s an iron without an ironing board? Exactly. It’s key to partner up your iron with a strong, well-formed board, including a soft-top or a padded cover, in which buttons are likely to sink away. Cotton is, in this case, the best choice. Other useful features to select your ironing board on is the possibility to adjust the height, an iron holder, and sleeve board. But instead of that, a narrow pointed end will do – ideal for shirts and pants.
And: if you’re feeling extra lazy, Brabantia even offers ironing boards that can be adjusted in height so much that you will be able to iron while sitting down.
A spray bottle
When you’re not using a steam iron, this element will be your best friend. Get your hands on a clean, unused spray bottle, and fill it up with water. The vaporizer will have the same effect on your clothes as the steam, spreading the mist evenly and allowing the iron to travel smoothly over fabrics, getting the wrinkles out of the shirt.
A little side note to this one: you want your shirt to be damp. Not drenched. Even better: when using a tumble drier, take the shirts out just before the program is finished. In this way, the textile is already damp. Easy!
A hanger or two
To avoid your freshly ironed shirt to start creasing again just after you’ve gone through all that hard work, provide yourself with a hanger for every shirt you’re going to iron. When finished, hang it up – this will be the perfect way for it to cool off and dry before you wear it. On a hanger, it will also be easier for you to perform a last check on any imperfections.
Optional: starch
When you are aiming for that stiff, extra persistent look and feel to your cotton and linen shirts, make sure to add starch to your shopping list. Starch will add body to the fabrics, as well as creating higher resistance to wrinkles and stains. However, this product is one that needs to be handled with care.
When using too much, it’s likely to cause flakes, stains, or damage to the shirt. So: thoroughly choose the type of starch, preferably one that is suitable for all different kinds of fabrics, and don’t be too generous when using the product. Spray a small amount on the shirt before you start ironing. And don’t forget to adjust the temperature of the iron – too high can cause damage.
Final warning: the two mistakes to avoid when ironing
Ready to get your iron on? Take a quick note on the following commonly made mistakes – and you’re good to go.
Using the wrong temperature on the type of fabric
Make sure you carefully check the washing label inside the fresh shirt you are about to iron. This way you’ll set the right temperature matching the fabric. Most (dress) shirts are made out of cotton or cotton blends – they can take on some heat. Other more delicate fabrics as polyester need to be treated with more care and thus a lower temperature.
Start by setting the iron at the lowest temperature and synthetic fabrics, and slowly move up in the thickness of fabric and temperature. Easy hack: the number of dots in the icon on the care label, corresponds to the dots on the temperature switch of the iron. Having a hard time understanding all those endless tiny symbols in washing labels? Tide has got you covered.
Overusing water
Listed above, we did advise you to use water. Either in the spray bottle or in the iron itself: just don’t overdo it. Especially when filling up the water tank in the iron, handling with care is a must. Filling it up over the maximum point can cause water spraying from the iron. Also, stubborn stains can turn up when the inside of the water reservoir is not cleaned from residue.
Water spraying can also be resulting from the temperature of the iron not being high enough or using the wrong kind of water. Usually, you can find the recommended type of water (tap or distilled) in the iron’s instruction book.
The easiest way to iron a shirt in order
The fundamental part of ironing is keeping the iron in motion, to avoid burning the materials and by moving the heat, stimulating smoothness. It might sound like a big project, but we promised you ironing a shirt is not hard. We’re getting there: the next five easy steps will guide you through.
Step 1: Ironing the collar & cuffs
We’ll start with the part that meets the eyes first: the collar. An ironed collar easily makes a significant difference to your look. Start by removing possible collar tabs and unbuttoning your shirt completely – which includes removing possible cufflinks and button-downs.
Unfold the collar, flatten it with the backside facing up and start by slowly pressing the material, working your way in from the edge of the collar. This way you will have those straight, crease-free, extra sharp collar points. Turn around and repeat this step on the inside part.
For the cuffs, unfold them and lay flat. Start ironing the inside of the cuffs and make sure to avoid the buttons. By no means, use your iron on buttons. Ironing the buttons can not only damage the buttons itself, but they are also likely to leave marks on the material. And these are not easy to get rid of. Once you are done with the inside, move over to the outside, and repeat the same technique on the other cuff.
Step 2: The sleeves
Now it gets tricky. Why?
The sleeves are the only part of the shirt where you will iron two pieces of fabric at the same time. This causes the fabric to wrinkle more easily since we are pressing them onto each other. Not many ironing boards are equipped with a sleeve board – but when yours is – you’re a lucky man.
This is how to iron your sleeves using a sleeve board: place the sleeve over the board, press the heat onto the fabric and turn the sleeve around until the entire surface of it is even and sleek.
No sleeve board? No worries. Here’s how to iron sleeves effectively without one.
- Make sure you lay the sleeve flat, with a folded seam on the shoulder.
- Smoothen the fabric first by using your hands.
- Then, using the iron, gently move your way from the shoulder part towards the cuffs.
- Turn the sleeve over once you have finished the front and repeat this step on the second sleeve. This way of ironing comes with the effect of having a fold on the shoulder. If you want to avoid this, fold a towel and place it in the sleeve.
Step 3: The yoke and shoulders
For a sharp and clean shoulder and back part (or: yoke) of your shirt, place the shoulder part over the end of the ironing board. Move the iron slowly, slightly pressing onto the fabric, from inwards out, moving towards the end. Repeat this for both shoulders. Is the ironing board not wide enough to iron the back in two parts, treat the middle-back part separately.
Step 4: The back part
Moving on to the bigger picture: this is an easy one. Place the inside of the shirt over the ironing board and use straight, lengthy motions to iron the fabric. If, in the meantime, your shirt has gone dry: use the spray bottle to dampen the material again to remove even the most persistent wrinkles. For the best result, try ironing the back both on the inside and outside of the fabric. Takes up a little more time, but worth the effort!
Step 5: The front and placket
Starting with the easiest part of the front: the side where the placket is. This is the side where the buttonholes are located, also an essential part that requires some extra attention. Place the shirt over the ironing board and iron along. Use gently pressing motions on the placket, and move from the collar towards the bottom of the shirt.
Once you’re finished on this side, move over to the side with the buttons. Repeat the same technique – but carefully avoid the buttons, using the tip of the iron while making rotating movements.
All set? Time to hang up that piece of art! Perform a final inspection, and once you’ve corrected any small creases, fold the collar back. Button up your shirt from bottom to top to keep the shape in order.
A piece of advice according to the shirt-ironing-pro’s: to save yourself time, gather more than one (depending on how many of them match the criteria of being freshly washed), and iron more of them in one session. Setting up your workstation in most cases takes up the biggest amount of time. Pour yourself a drink (but don’t spill) and get that job done.
FAQ
How to iron without an ironing board?
If you ever find yourself in this situation, there’s one important core element you need. Make sure you find yourself a flat surface, preferably bigger than the piece of clothing you want to unwrinkle, like a table or even the floor will do. Never iron without covering the surface, and avoid burning by using a towel or any other heat-resistant fabric. Also, the surface should be heatproof: go with tile or wood.
How do I unwrinkle clothes without an iron?
Many stores sell wrinkle removers. It will probably not remove all of the creases, but it will cover the base. Hang the piece of clothing you want to unwrinkle on a hanger and spray on the product with care. Leave it to dry a few minutes before you wear it, to let the product work, and avoid lasting wrinkles.
Another solution could be to hang your clothing on a hanger while taking a shower, letting the steam do its work on the garment – the gravity will remove the wrinkles. Pro tip: still slightly damp fabrics from the washing machine go well with this trick.
I don’t have time to iron my shirt: what can I do?
For this matter, here’s what we call the Quick Fix. When in a rush, take a quick moment to iron only the main torso part of the shirt, along with the collar. The only downside to this technique is that you will probably not be able to take off your blazer, jacket, or cardigan. But, at least your extra sharp collar points will stand out the crowd.
Can you iron clothes straight from the washing machine?
The answer to this question is yes. You can iron your clothes straight from the washing machine, but it will work better on some fabrics than others. It works specifically well with (dress) shirts and other thin materials. Hang them up when you’ve finished ironing, so they can dry up wrinkle-free.
Should you iron T-shirts?
Not really. To keep your t-shirts in the good quality you’ve bought them, wash them at a low temperature and preferably hang them to dry on a hanger when washed. This will prevent extreme wrinkling. When storing them, hanging instead of folding is another hack to keep them from creasing.
Should you iron shirts inside out?
When ironing with steam, or ironing while using the spray bottle isn’t doing the trick, you can definitely go with the inside-out technique to remove extra persistent wrinkles. Also: starting by ironing fabrics inside out, keeps you from accidentally burning or staining on the visible, outside of the fabric. When you happened to have chosen the wrong temperature or when there’s a lack in the cleanliness of the iron – you’ll still be kind of safe, hopefully.
How do I clean my iron?
The exterior and steam holes: mix one tablespoon of water and two tablespoons of baking soda. Apply this on the soleplate, wipe it clean by using a clean, damp cloth. To clean the steam holes, dip a cotton swab in distilled water and gently clean the vents.
For the water reservoir, fill it up with distilled water up to one third and turn on the steam function at its highest capacity. Iron a clean, slightly damp towel for a few minutes while using the steam option. Finally, remove any remaining water from the reservoir and store the iron in a place where it may leak any fluids.
To avoid repeating this step after every ironing session, empty the iron’s water tank after every use. This way you will prevent unwanted residue from building up.


